I'm headed out of the country for a couple months, and while I'm away my Etsy shop will be temporarily closed. I'll be re-opening on August 10, so please check back if you're interested in buying or commissioning a basket! In the meantime, take a peek at my Gallery to see the baskets that I've made recently, some of which are still available to purchase. Feel free to send me a message (turquoiseandtwill at gmail dot com) if you'd like to reserve a basket in advance of the shop's re-opening.
Have a wonderful summer, all!
- Rachel

Tuesday, June 16, 2015
Sunday, June 7, 2015
Wedding Baskets
This spring, I've made two baskets as wedding gifts - one for some friends of mine whose wedding was last week, and another that was commissioned by my friend Ann (who's also one of my most loyal customers!) for a wedding she has coming up this summer. While the basket I made for Ann is a traditional Williamsburg style, the basket in coral and navy, which were my friends' wedding colors, is a totally original design I came up with just for them. Enjoy the pictures, and send me a note if you've got a wedding basket in mind that you'd like to commission!


 | ||
| Coral and Navy Wedding Basket with Tulip Handle and Braided Rim |

 |
| Williamsburg Wedding Basket in a Dark Walnut Stain |
Tuesday, March 24, 2015
Traditional Choctaw Basketry
One of the most interesting traditional basket designs I have ever encountered is the pointed-bottom wall pouch that is historically associated with the Choctaw tribes of the southeastern United States. Today there are three nations of Choctaw Native Americans, living in Oklahoma, Louisiana, and Mississippi. These tribes have a rich history of basket-weaving, and several distinct styles of Choctaw baskets exist.
Traditional Choctaw baskets were (and still are) woven from
river cane, which is harvested and then processed into strands of cane fibers.
These fibers were sometimes dyed in shades of black/brown, red, and yellow,
originally using plant-based dyes and pastes from species native to the Southeast, such as black walnut, red oak, and black gum trees. Today most Choctaw
baskets are made using commercial dyes, which I also use to dye the reed for
my baskets (to find out more about my dying process, check out the tutorial I posted recently).
 |
| Large Wall Pouch (front) |
 |
| Large Wall Pouch (back) |
 |
| "Pointed" basket (from ChoctawNationCulture) |
Other styles of Choctaw baskets include pack baskets, “elbow” baskets (named for their shape), and lidded baskets. One of the ways to distinguish Choctaw baskets from other river cane baskets is by their distinctive wrapped rim and handles, which you can see on some of the baskets shown here. Another distinctive feature of Choctaw basket design is that many baskets are double-walled, with different designs visible on the inner and outer walls, and all of the Choctaw baskets that I've seen are plaited (plaiting is a weaving method where the horizontal and vertical elements are spaced evenly).
 |
Elbow basket (from AccessGenealogy) |
For more information on Choctaw history and culture,
especially the tribes’ rich basket-weaving traditions, see Culture and Customs of the Choctaw Indians, by Donna Akers (2013),
as well as the websites listed below.
Thursday, March 19, 2015
Repairing an Antique Basket
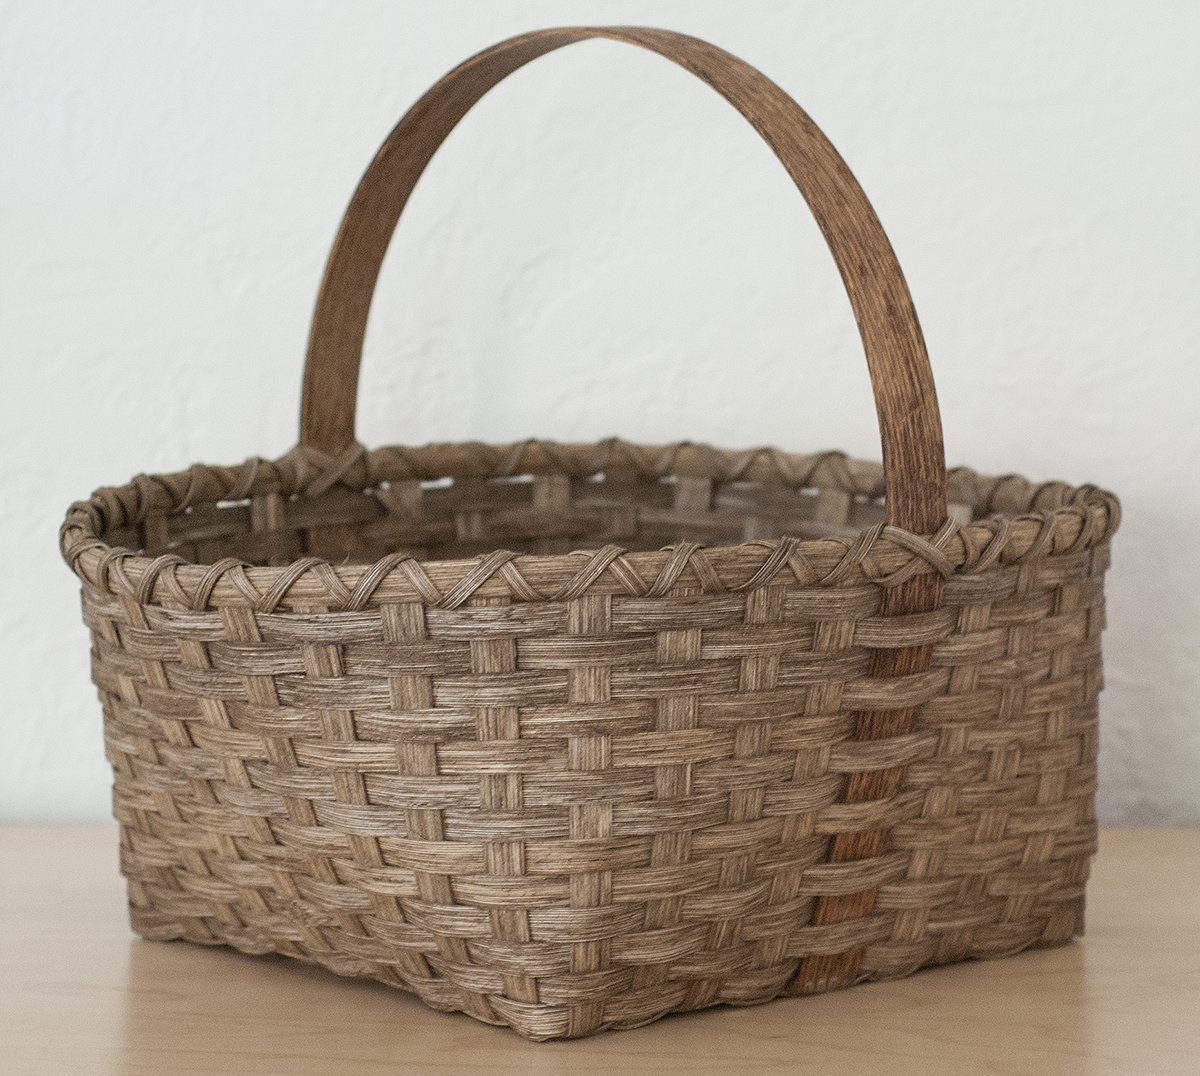
A friend gave me a basket a while back that needed repairs to its base and handle, where the reed had become brittle with age and broken in a few places. It was an antique Norwegian basket that had originally belonged to her grandmother, and she asked if I would be able to repair it.
Since the basket was woven with a fairly standard size of reed (#2 round according to my measurements), I was able to stain some reed and weave small pieces alongside the old, broken stakes to secure the brittle areas. The patching was successful in strengthening the basket and is a bit more inconspicuous than the previous method of repair (an old shoelace woven in alongside the broken stakes). Take a look at the before-and-after photos to see the difference the repairs made! Hopefully they will help the basket survive so that many more generations will be able to appreciate its simple beauty.
Since the basket was woven with a fairly standard size of reed (#2 round according to my measurements), I was able to stain some reed and weave small pieces alongside the old, broken stakes to secure the brittle areas. The patching was successful in strengthening the basket and is a bit more inconspicuous than the previous method of repair (an old shoelace woven in alongside the broken stakes). Take a look at the before-and-after photos to see the difference the repairs made! Hopefully they will help the basket survive so that many more generations will be able to appreciate its simple beauty.
 |
| Bottom (before) |
 |
| Bottom (after) |
 |
| Handle, left (before) |
 |
| Handle, right (before) |
 |
| Handle (after) |
Tuesday, March 17, 2015
New Etsy Listings!
I've finished a few more projects and posted some new listings on Etsy. These include the two Choctaw pouches I mentioned in an earlier post as well as a custom order and some patterns. The Color Scrap Basket pattern (which I posted free of charge for blog readers!) is now available to purchase, along with the basket that is shown in the pattern. Tomorrow I'll be posting a miniature version of the Appalachian basket I've made in the past, together with the pattern for that basket as well!
I sold the larger of the Shaker cheese baskets and have requests for more, so that's getting added to the list of baskets to make soon. Stay tuned for the colorful tray and the two chevron twill baskets I've promised - they're coming soon.
I sold the larger of the Shaker cheese baskets and have requests for more, so that's getting added to the list of baskets to make soon. Stay tuned for the colorful tray and the two chevron twill baskets I've promised - they're coming soon.
|
|


 |
| Small Choctaw Pouch (front) |
 |
| (back) |
 |
| Mini Appalachian Basket |
 |
| Custom Bathroom Basket for Nickie |
 |
| Color Scrap Basket |
Thursday, March 12, 2015
Free Pattern - Color Scrap Basket
As a preview of the kinds of basket patterns I've been working on, I'm offering readers a FREE basket pattern here! It will retail for $4.00 at my Etsy shop, but to thank you for checking out my new blog, I'm giving it away here.
This basket pattern isn't just a pattern, it's also a photo tutorial that walks you through all the steps involved in making a basket, from cutting the reed to lashing the rim. Everything is explained so that even complete beginners can follow the detailed instructions.
Have you ever wondered what to do with the leftover pieces of reed you dyed for various projects? Try making this quick, simple, and cute little basket using leftover colored reed! Here's a preview of the pattern:
 Click here to download the Color Scrap Basket pattern PDF.
This basket pattern isn't just a pattern, it's also a photo tutorial that walks you through all the steps involved in making a basket, from cutting the reed to lashing the rim. Everything is explained so that even complete beginners can follow the detailed instructions.
Have you ever wondered what to do with the leftover pieces of reed you dyed for various projects? Try making this quick, simple, and cute little basket using leftover colored reed! Here's a preview of the pattern:
Sunday, March 8, 2015
Tutorial - How to Dye Reed on the Stove
To achieve the bright, vibrant colors I use for my baskets, I dye reed in small batches in an old stock pot on the stove. There are several different ways to dye reed, but this method is incredibly easy and works for any living situation (even small apartments with tiny kitchens like mine). If you're dyeing indoors, remember to be careful when removing reed from the dye bath, as it's easy to make a mess.

I've found that RIT fabric dye produces vivid colors that set very well, and you can blend colors to create any shade you want! Check out the RIT studio website for color-mixing charts and ideas. RIT is also fairly easy to clean up with water in the case of inevitable drips.
Step 1: Prepare your reed. You can either dye whole coils of reed and cut them later, or if you know what basket(s) you'll be making, you can cut the reed in advance and dye the pieces. I prefer the second option, as it results in less leftover colored reed, although I always dye a few extra pieces of whatever size I need, just in case. I also throw in scraps from previous projects to use in my "color scrap" baskets.

Today, I wanted to dye reed for several of my current projects, so I had four color batches: yellow, aquamarine, red, and teal. I prepared the reed and separated them into labeled bags, as shown above.

Step 2: Set up the dyeing station. Any large pot will work as long as it has a wide bottom that can fit a coil of reed. The wider, the better, since you want to use as little water as possible so that the dye will be potent enough to produce bright colors without soaking the reed too long.

I use an old stock pot and rubber gloves, since the dye will definitely stain your hands. I wouldn't recommend using any pot that you still use for cooking, since it's difficult to be sure that you've scrubbed out every particle of dye, even after washing the pot thoroughly.
Step 3: Create the dye bath. Add about 1 inch of water to the bottom of the pot, then turn on the heat to medium-high until the water is simmering and steaming (but not quite boiling). Turn off the heat, and pour in the liquid or powder dye a little bit at a time.


Use a scrap of reed to stir the water to ensure that the dye is well mixed, and test the strength of the dye with other scrap pieces after adding a small amount. Only dip reed for 30 seconds or less; you do not want to let reed soak in the hot dye bath for longer than a minute. Keep adding dye until the test pieces of reed are the color you want after being dipped in the dye bath for a short amount of time. Again, if it takes longer than 30 seconds to achieve the color you want, add more dye to make a stronger bath; soaking reed in very hot water for long periods of time can weaken the reed and make it difficult to work with.


I used about half a bottle of liquid for the yellow, which was weaker than the red; it only took about a quarter of a bottle to achieve the same strength of color for the scarlet dye. The aquamarine was not properly mixed and ended up being very weak; remember to shake your bottles of liquid dye to ensure clumps of dye haven't settled at the bottom. The powder dye tends to be a bit more concentrated, so if you can find it in the color you want, go for that rather than the liquid.
Step 4: Dye the reed in batches. For each color you're working with, coil your reed or bunch your pieces and dip them in the dye. Since there should only be about 1 inch of water in the pot, you can set them down so you don't scald your hands trying to hold them in the water. Let them sit for a few seconds, then flip the coil if it is too large to immerse completely, like the coil of reed I'm dyeing in the first picture below. Depending on the amount of reed you want to dye, you might need to divide the reed into several coils and dye them one after another.


If you're working with multiple colors, remember to wash the pot thoroughly between batches to avoid cross-contamination of color! If you can't seem to get all the color out of the bottom of the pot, try boiling some water in it; this will help release any last bits of dye stuck to the bottom.
Step 6: Dry the reed. Wet reed will get mildewy fairly easily, so it's important to dry the reed you've just dyed very thoroughly. I use a craft table covered with paper grocery bags, set up near a window. Dry the reed overnight if possible; if you cannot leave the reed out overnight, place it loosely inside paper bags and store them in as warm and dry a place as possible to help them dry out completely.

As you can see, this method results in very bold colors while using a minimal amount of dye, so it's cost-effective and doesn't require a fancy outdoor setup!
Sometime soon, I'll post a tutorial specifically on how to space-dye reed to produce gradients of color, like the reed used in my space-dyed twill market basket. Until then, stay tuned for a free basket pattern that uses color scraps and leftover dyed reed, coming later this week!
I've found that RIT fabric dye produces vivid colors that set very well, and you can blend colors to create any shade you want! Check out the RIT studio website for color-mixing charts and ideas. RIT is also fairly easy to clean up with water in the case of inevitable drips.
Step 1: Prepare your reed. You can either dye whole coils of reed and cut them later, or if you know what basket(s) you'll be making, you can cut the reed in advance and dye the pieces. I prefer the second option, as it results in less leftover colored reed, although I always dye a few extra pieces of whatever size I need, just in case. I also throw in scraps from previous projects to use in my "color scrap" baskets.
Today, I wanted to dye reed for several of my current projects, so I had four color batches: yellow, aquamarine, red, and teal. I prepared the reed and separated them into labeled bags, as shown above.
Step 2: Set up the dyeing station. Any large pot will work as long as it has a wide bottom that can fit a coil of reed. The wider, the better, since you want to use as little water as possible so that the dye will be potent enough to produce bright colors without soaking the reed too long.
I use an old stock pot and rubber gloves, since the dye will definitely stain your hands. I wouldn't recommend using any pot that you still use for cooking, since it's difficult to be sure that you've scrubbed out every particle of dye, even after washing the pot thoroughly.
Step 3: Create the dye bath. Add about 1 inch of water to the bottom of the pot, then turn on the heat to medium-high until the water is simmering and steaming (but not quite boiling). Turn off the heat, and pour in the liquid or powder dye a little bit at a time.
Use a scrap of reed to stir the water to ensure that the dye is well mixed, and test the strength of the dye with other scrap pieces after adding a small amount. Only dip reed for 30 seconds or less; you do not want to let reed soak in the hot dye bath for longer than a minute. Keep adding dye until the test pieces of reed are the color you want after being dipped in the dye bath for a short amount of time. Again, if it takes longer than 30 seconds to achieve the color you want, add more dye to make a stronger bath; soaking reed in very hot water for long periods of time can weaken the reed and make it difficult to work with.
I used about half a bottle of liquid for the yellow, which was weaker than the red; it only took about a quarter of a bottle to achieve the same strength of color for the scarlet dye. The aquamarine was not properly mixed and ended up being very weak; remember to shake your bottles of liquid dye to ensure clumps of dye haven't settled at the bottom. The powder dye tends to be a bit more concentrated, so if you can find it in the color you want, go for that rather than the liquid.
Step 4: Dye the reed in batches. For each color you're working with, coil your reed or bunch your pieces and dip them in the dye. Since there should only be about 1 inch of water in the pot, you can set them down so you don't scald your hands trying to hold them in the water. Let them sit for a few seconds, then flip the coil if it is too large to immerse completely, like the coil of reed I'm dyeing in the first picture below. Depending on the amount of reed you want to dye, you might need to divide the reed into several coils and dye them one after another.
When the reed has achieved the color you want, which might require flipping the bundle once or twice to ensure that all the pieces have gotten fully dipped, carefully remove the reed from the pot and take it to the sink.
Step 5: Rinse the reed in cold water. If you rinse it in warm water, more of the color will leach from it as it rinses. Rinsing in cold water helps set the color. If you're concerned about the strength of your color or about the color setting properly, you can add a tablespoon of white distilled vinegar to the dye bath, along with a teaspoon of salt. I usually don't bother with this, but other weavers swear by vinegar and salt for helping their dye set. The temperature of the water involved in the bath and the rinse process seems to be much more important in setting the color, in my experience. Almost simmering water for the bath and very cold water for the rinse is the perfect combination!
If you're working with multiple colors, remember to wash the pot thoroughly between batches to avoid cross-contamination of color! If you can't seem to get all the color out of the bottom of the pot, try boiling some water in it; this will help release any last bits of dye stuck to the bottom.
Step 6: Dry the reed. Wet reed will get mildewy fairly easily, so it's important to dry the reed you've just dyed very thoroughly. I use a craft table covered with paper grocery bags, set up near a window. Dry the reed overnight if possible; if you cannot leave the reed out overnight, place it loosely inside paper bags and store them in as warm and dry a place as possible to help them dry out completely.
As you can see, this method results in very bold colors while using a minimal amount of dye, so it's cost-effective and doesn't require a fancy outdoor setup!
Sometime soon, I'll post a tutorial specifically on how to space-dye reed to produce gradients of color, like the reed used in my space-dyed twill market basket. Until then, stay tuned for a free basket pattern that uses color scraps and leftover dyed reed, coming later this week!
Subscribe to:
Posts (Atom)